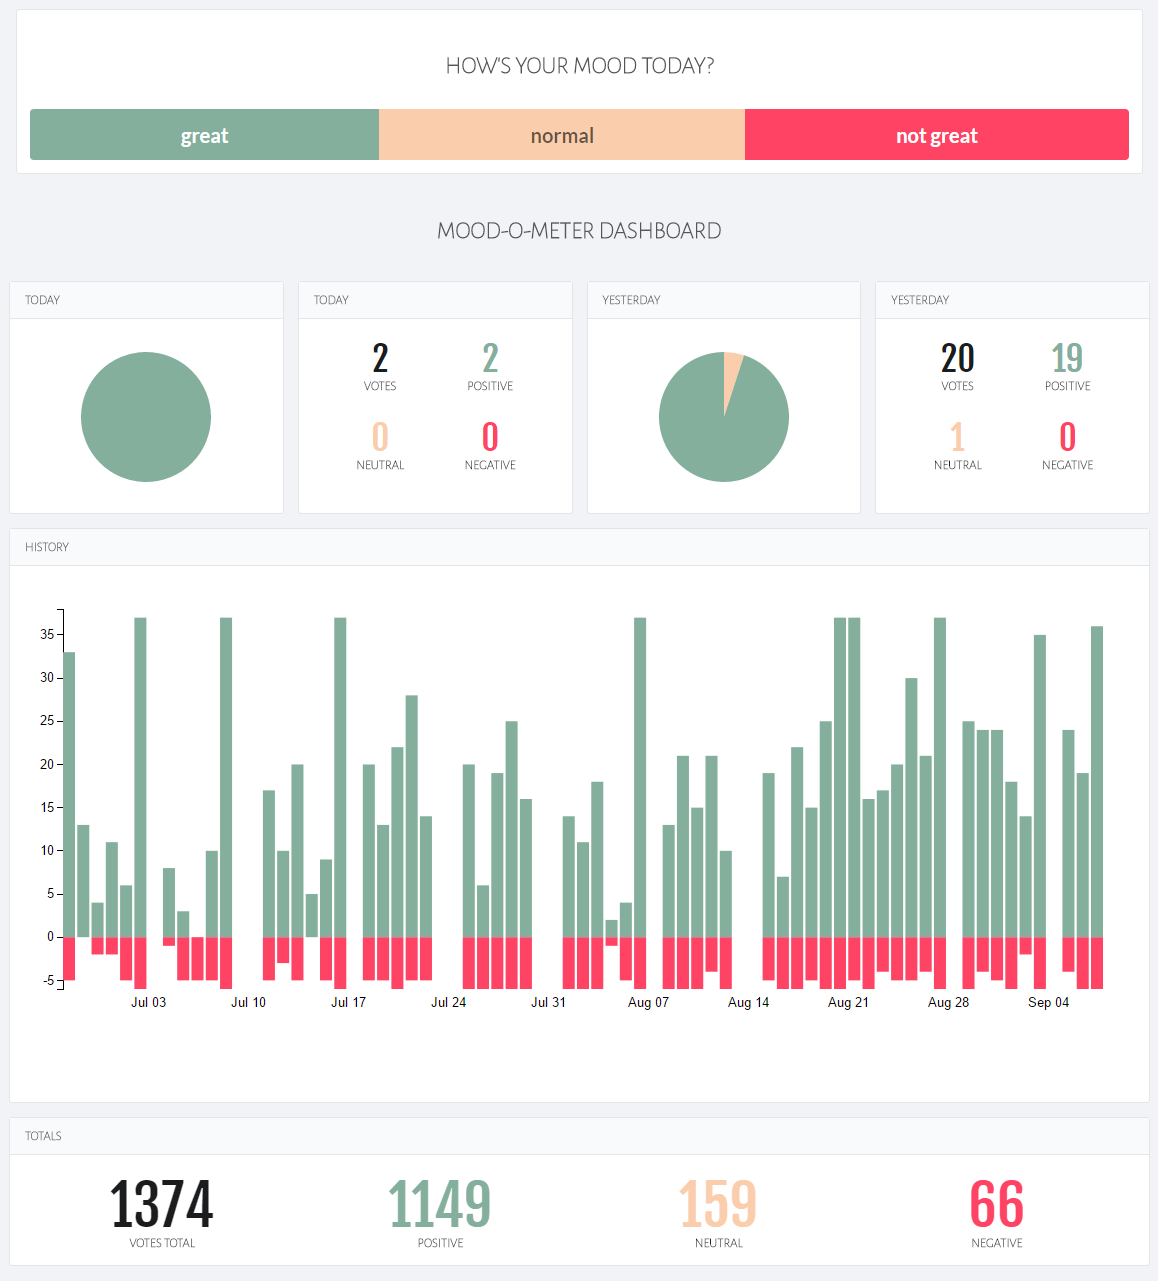
Conducting employee surveys every few months is a common and effective way to evaluate employee satisfaction. But we thought we could spice up this feedback process by providing our staff with an additional feedback channel that is fun to use and delivers practically up-to-the-minute results: the Mood-o-Meter. Press a button, express your mood and see company-wide results on a daily basis.
Besides the hardware involved, we also needed a place to aggregate the data and to display the daily results. So we decided to build a small prototype app using Meteor, which would even allow for a mobile app later on.
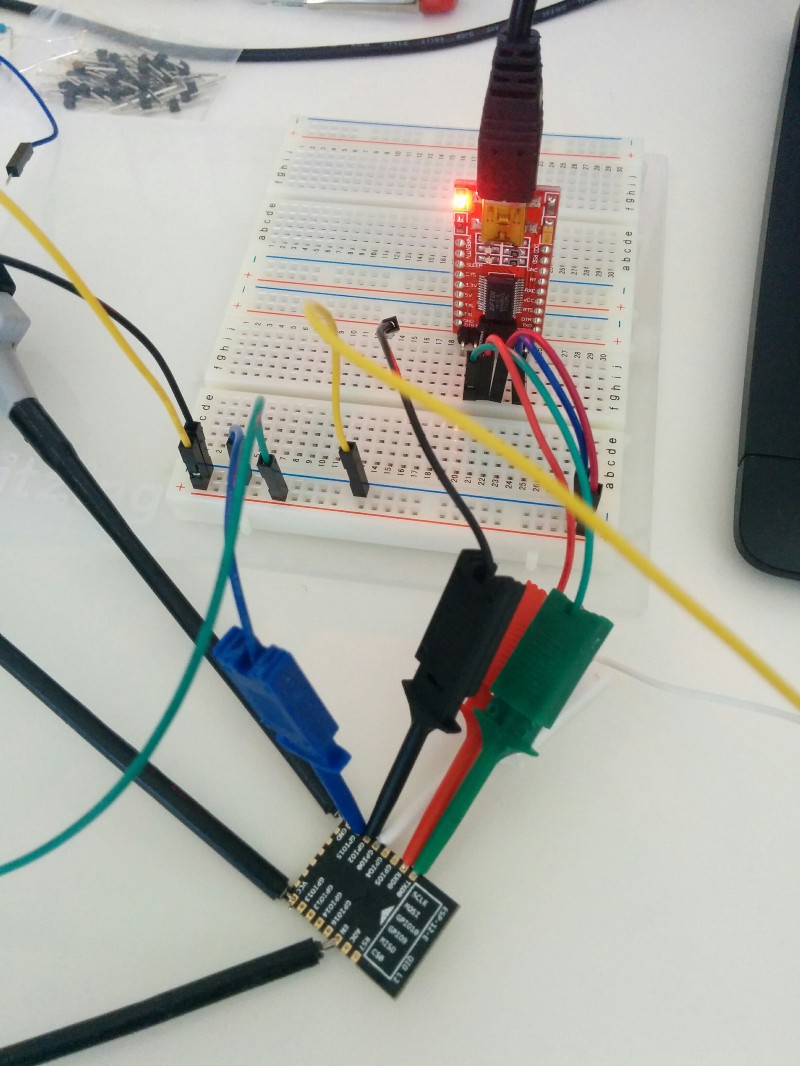
For the hardware part, we decided to use an ESP8266 with a couple of buttons and LEDs in a box. The ESP8266 is a pretty neat microcontroller that offers built-in WiFi support, has a great community with the NodeMCU platform and is extremely affordable (between 2 to 10 euros depending on where you source it).
Our Mood-o-Meter runs on the NodeMCU firmware, which uses Lua as a scripting language and provides an https client, WiFi negotiation and LED helpers out of the box.
We started out by getting the WiFi access working. With its enduser setup module, the firmware provides an easy-to-use system for that purpose. Once it was all set up, the next step was to send an API POST to the Meteor endpoint we implemented earlier.
Since our app was supposed to use https exclusively, we now needed to execute an https request. Unfortunately, this step took us longer than expected. According to the documentation, the firmware’s http module supports https. But due to a bug or a mistake on our part we weren’t able to use it. To complete the prototype, we decided to go with the bare TCP module and implemented an http call instead.
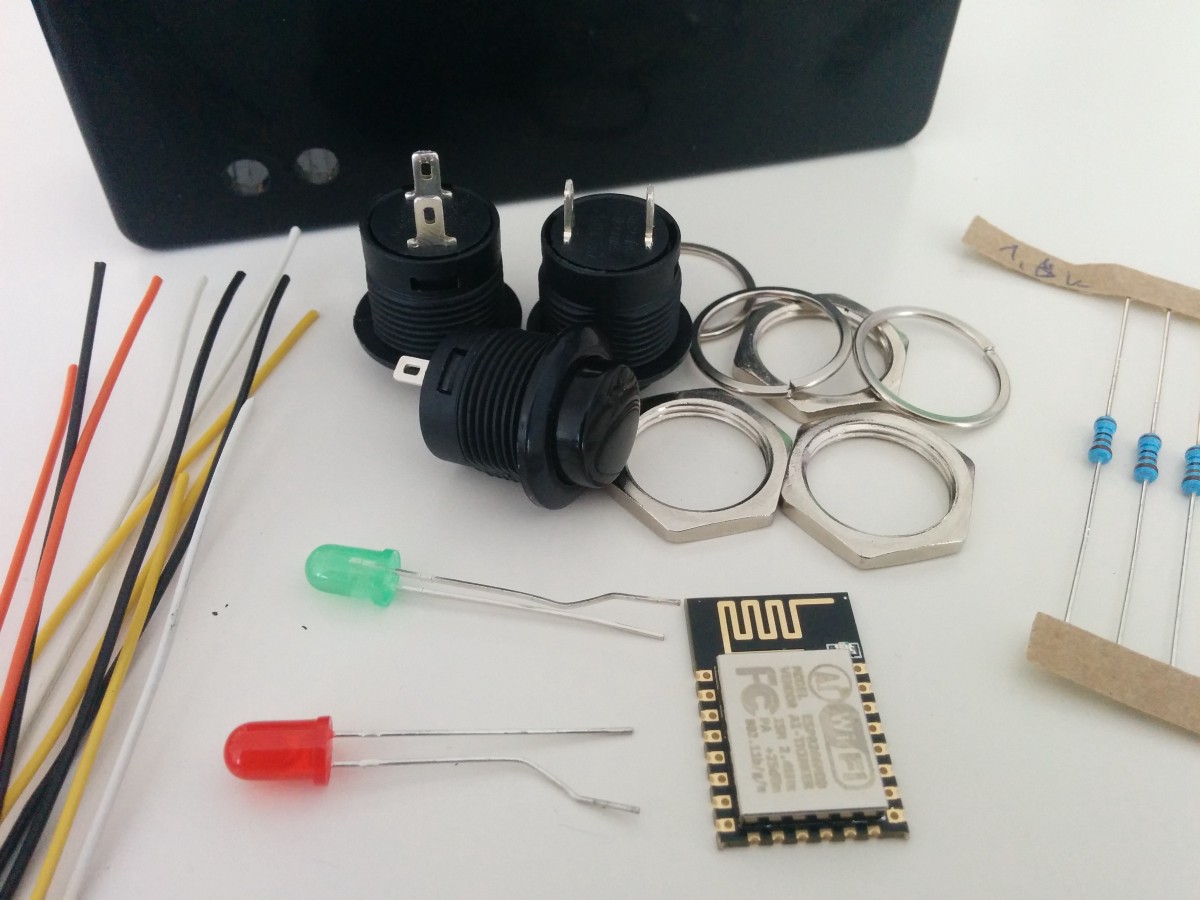
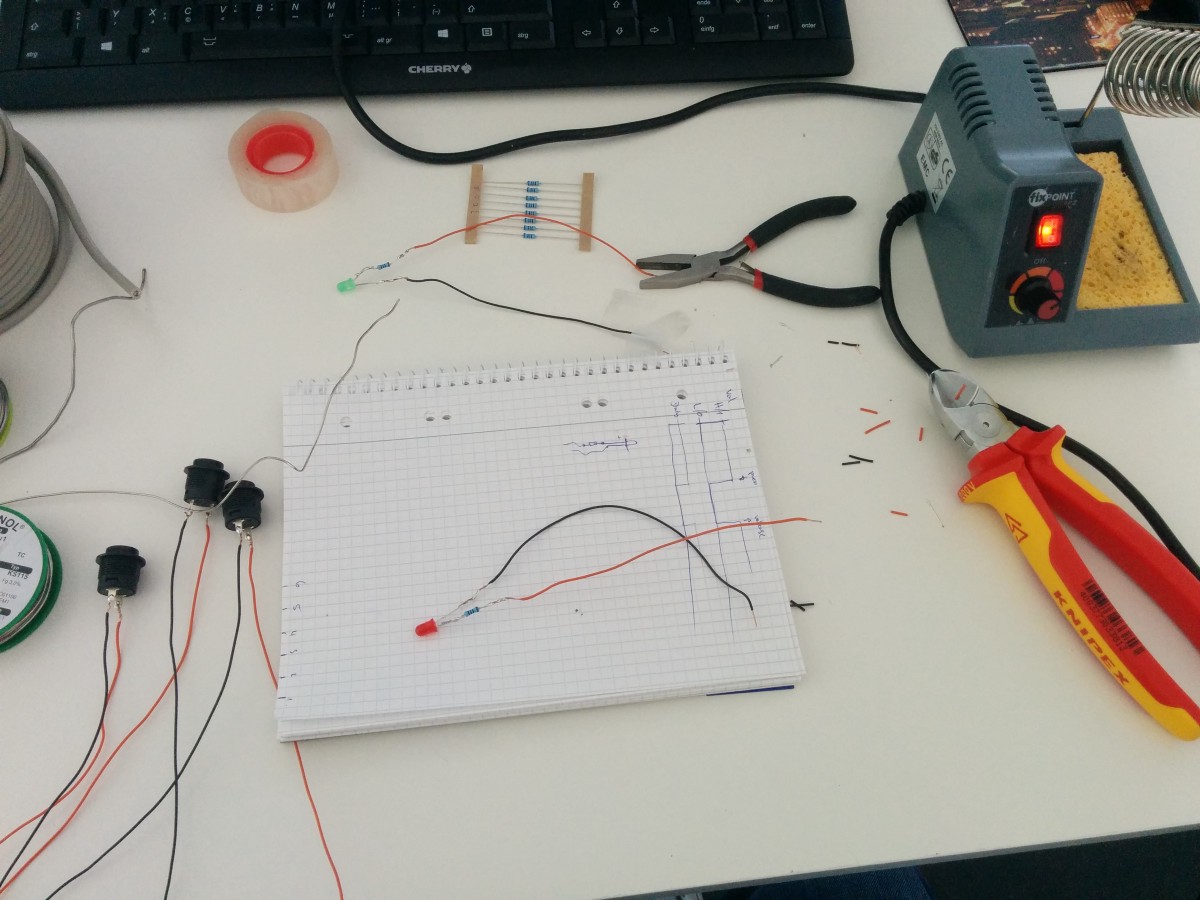
The last things we needed to take care of were the LEDs, buttons and a few lines of code. Our prototype only required two LEDs. For each, we used a single GPIO pin on the ESP8266. To turn them on/off and to make them blink by name we wrote a couple of helpers.
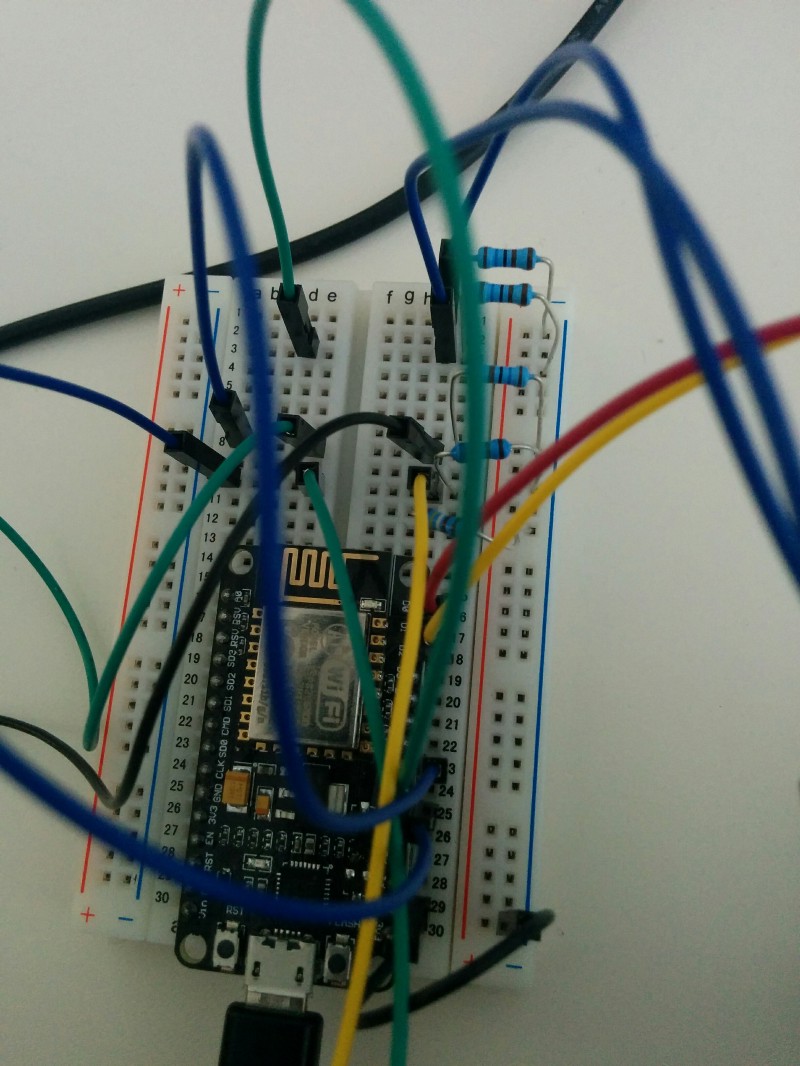
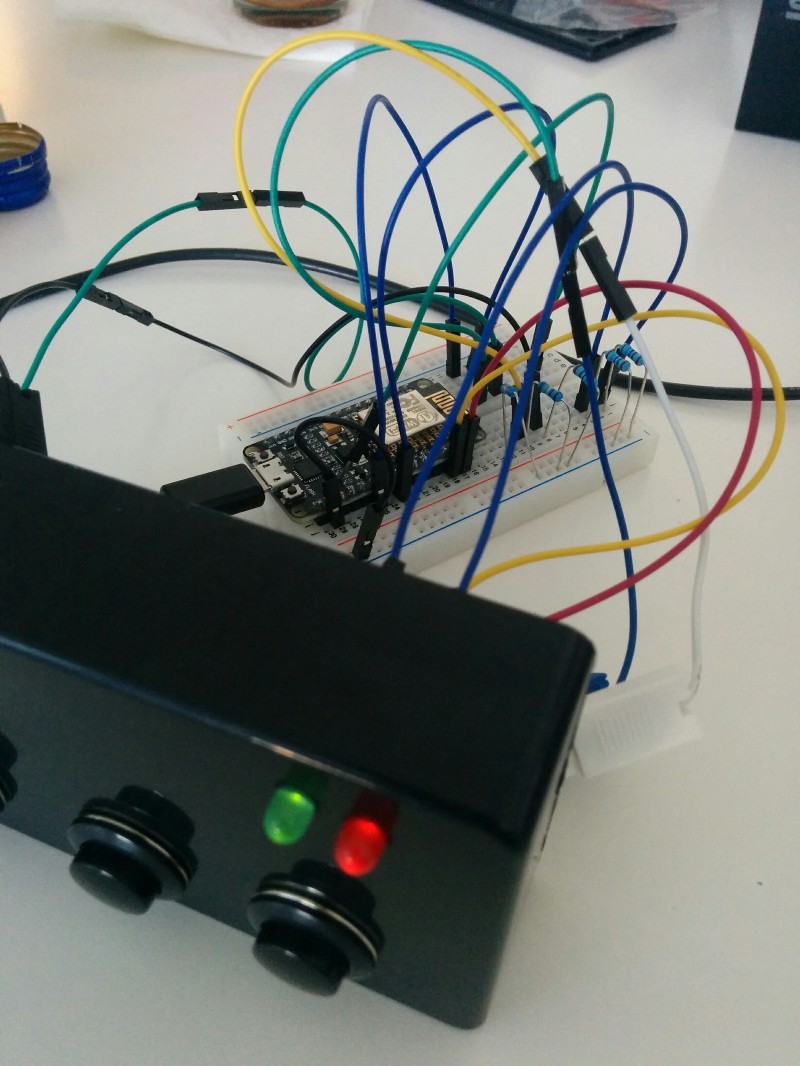
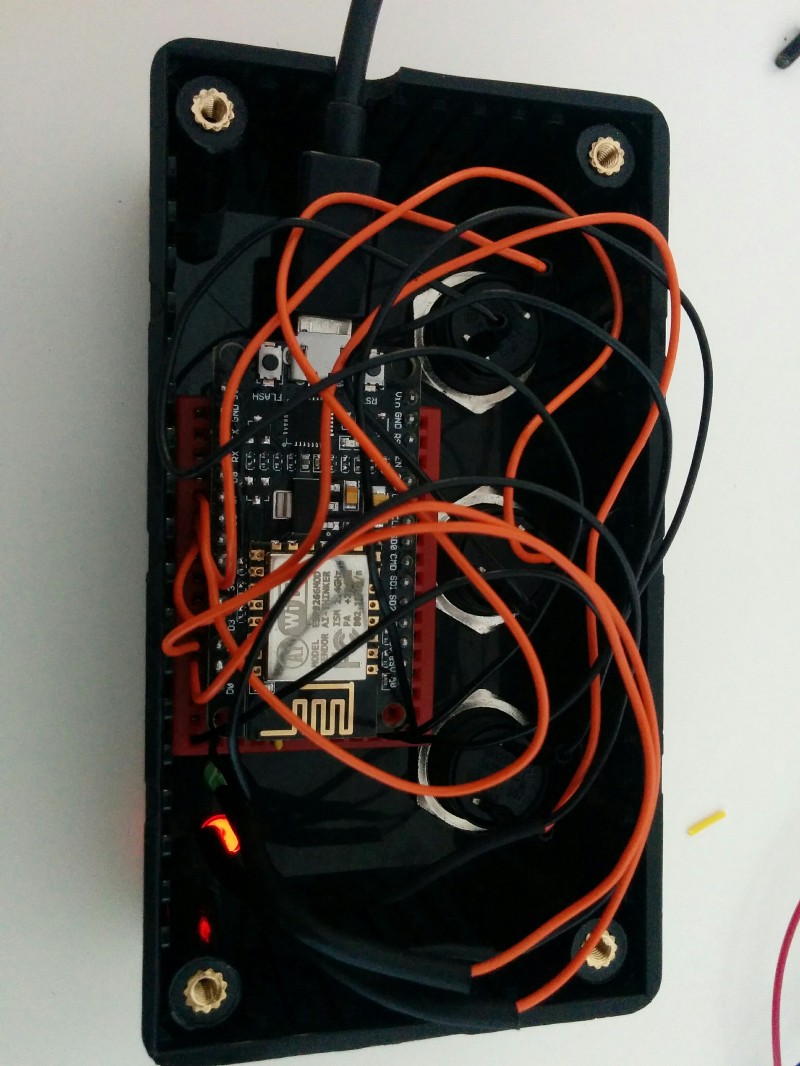
We also used a single GPIO for each button. Here, we had two additional requirements for which the existing module doesn’t provide any solution. First, we needed to ensure that single press of the button only sends one corresponding API request. To achieve this, we set it up so that the API request isn’t triggered until the respective button is released. Second, to reduce the risk of manipulation, we decided to lock the buttons for a short interval after somebody has pressed one of them. For that purpose, we added a timer to our code which blocks the API from sending for a while. One of the LEDs indicates that the Mood-o-Meter is currently blocked.
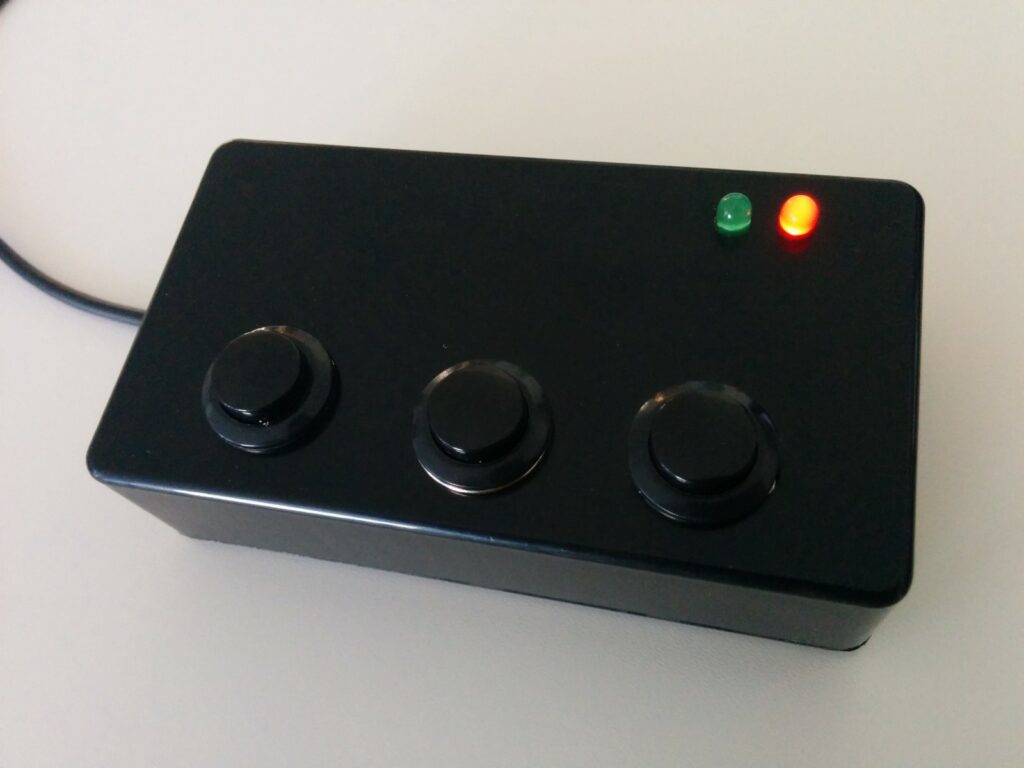
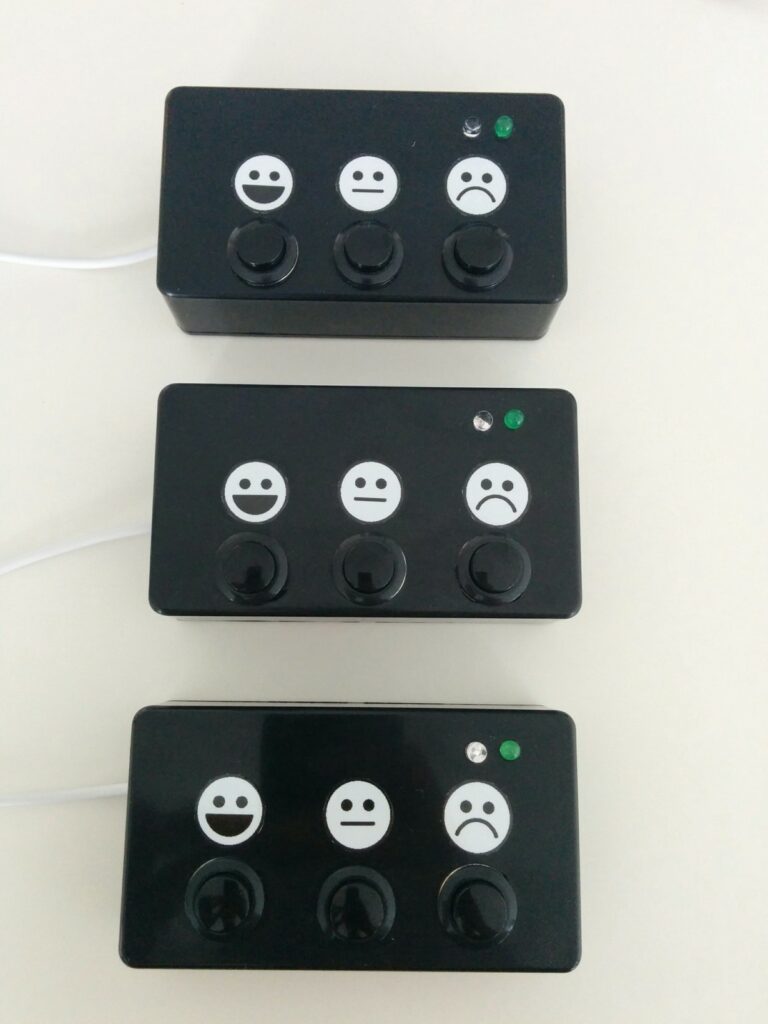
Since completing the prototype, we have built a few more Mood-o-Meters and installed one device on each floor in our office, where they are currently happily recording our co-workers moods.
The Mood-o-Meter is an outcome of our monthly IT open space.